
This part will share about how to install OSSIM on Virtual Box.
Both with VMWare or VirtualBox, it’s does not much show the different about how to install OSSIM in there.
Because i am using Linux OS, and more prefer to use Virtualbox to my environment, so this will discuss about OSSIM installation on Virtual Box.
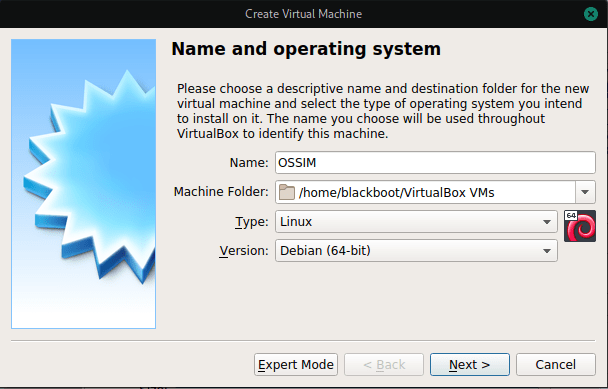
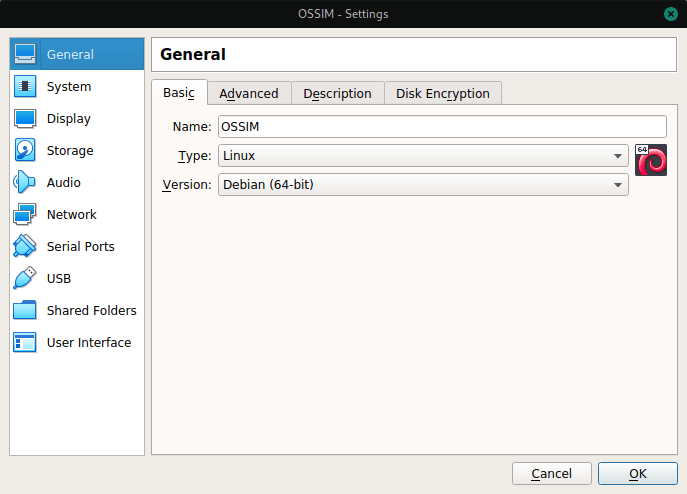
Let’s open the Virtual Box Manager, and create new virtual machine, fill for the name with OSSIM, locate the virtual file on your own directory, and for the Type options fill with Linux, with Version using Debian 64 bit, because OSSIM based on Debian Operating Systems.
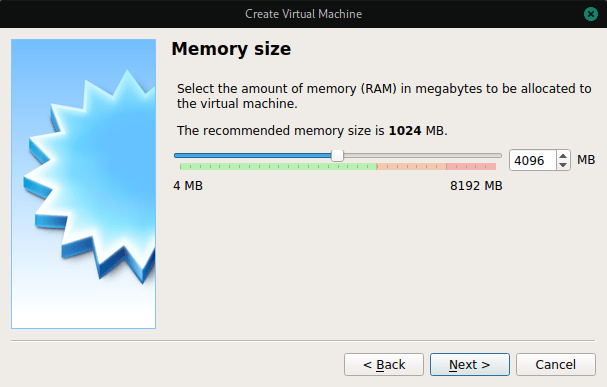
Click Next, and your virtual machine windows will show about Memory Size, i used sized about 4GB for this OSSIM machine.
Next, choose for “create virtual hard disk now” option
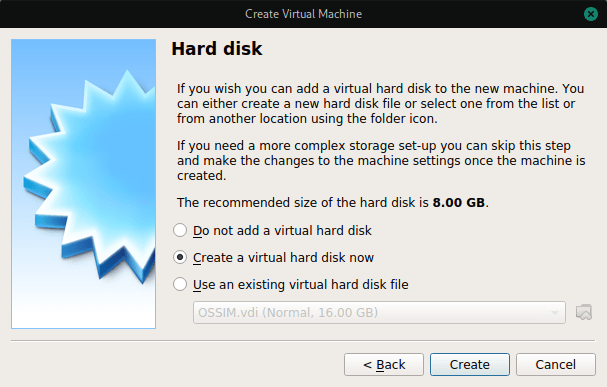
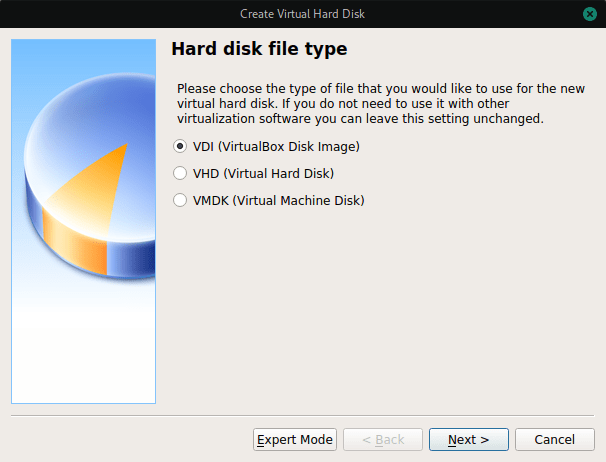
Choose VDI for VirtualBox Disk Image.
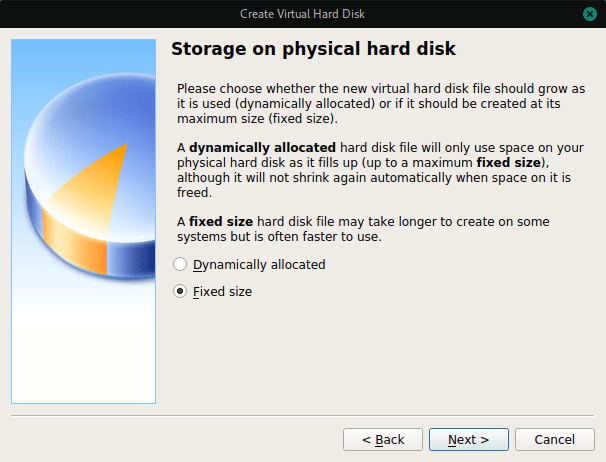
And then for Storage on physical hard disk, i choose Fixed Size, this optional for you, as describe on the window, you can see the different between Fixed and Dynamically Size.
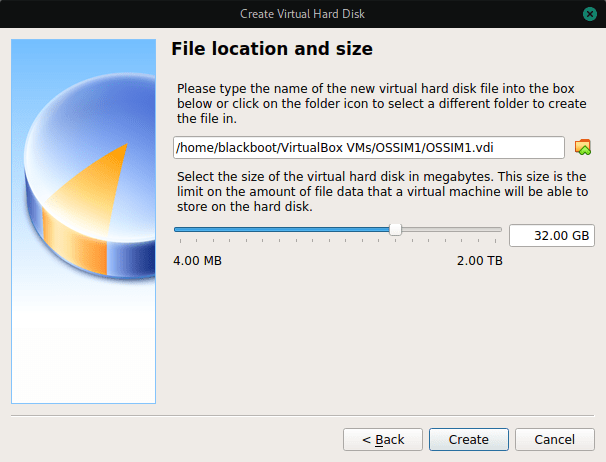
Set your hard disk size, and the file location, and than click Create button.
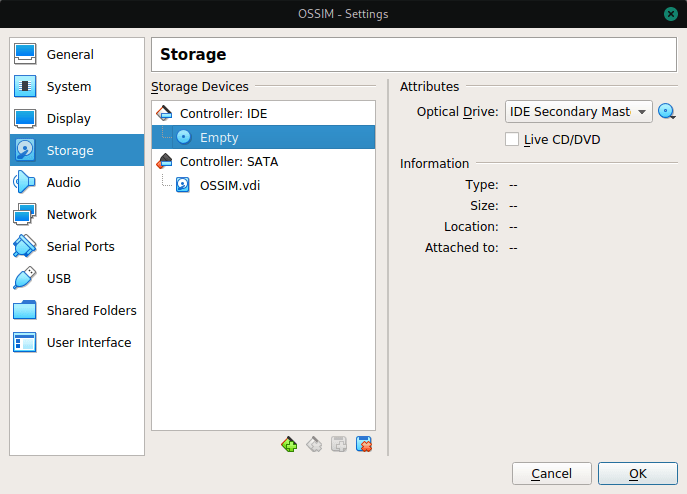
Now your virtual machine all ready create on VBox Manager, click on your OSSIM machine, and then click Setting button.
Go to the Storage on the left tab, and on the Attributes Optical Drive, click and direct to your OSSIM ISO that you’ve been downloads from Alienvault website.
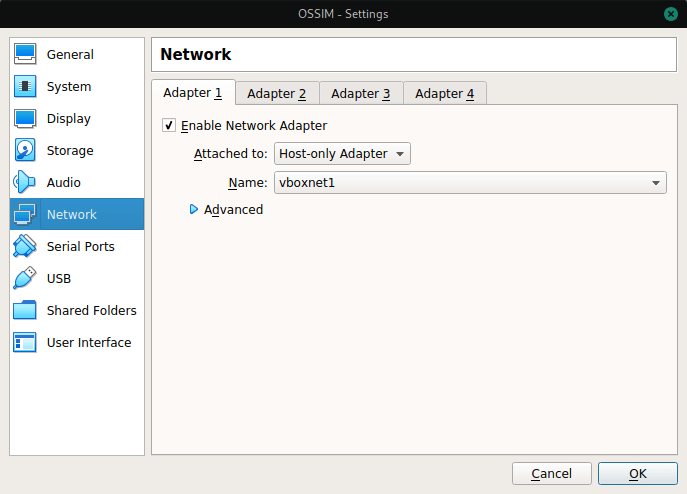
Click on the Network tab, choose your network configuration, you can used NAT or Host only Adapter option.
After completed, you can click OK button and back to the VirtualBox Manager windows, click Start to deploy your OSSIM machine.
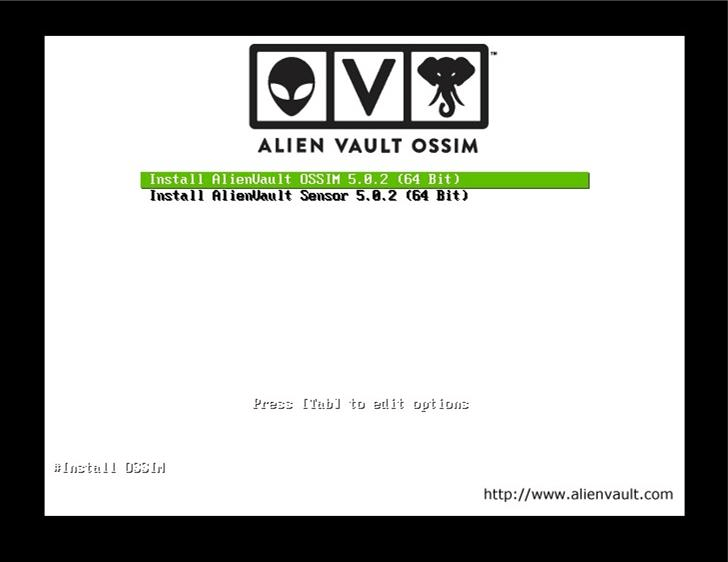
Choose Install Alienvault OSSIM to start the installation.
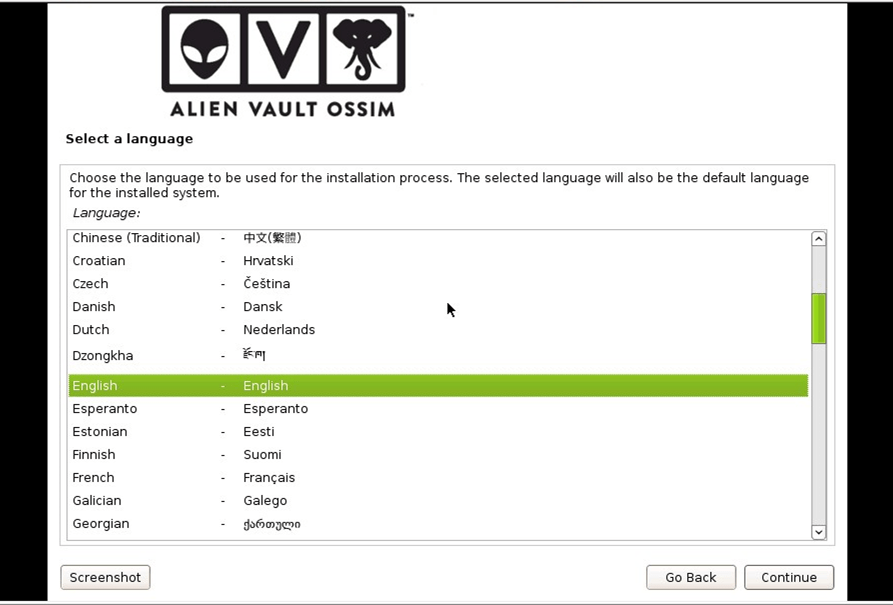
Fill your language, and than Continue
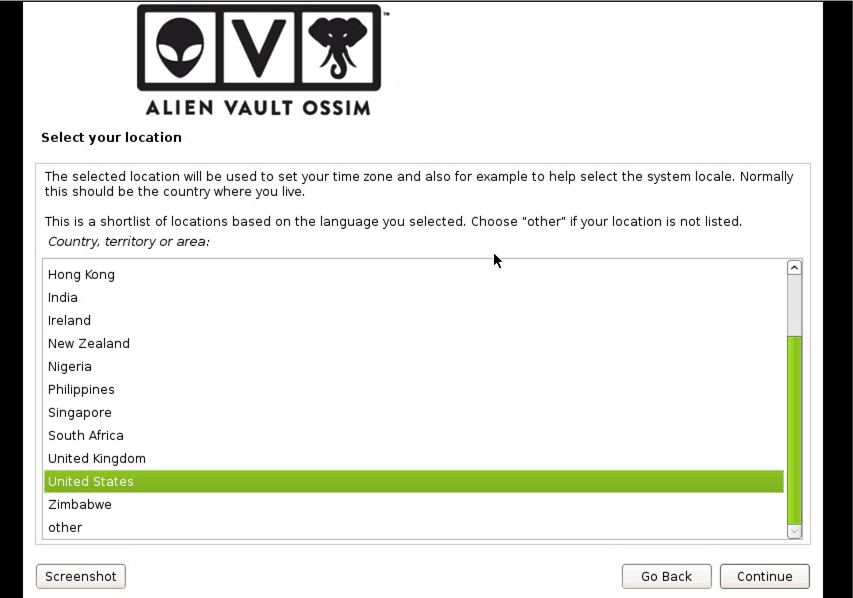
Choose your country, Continue
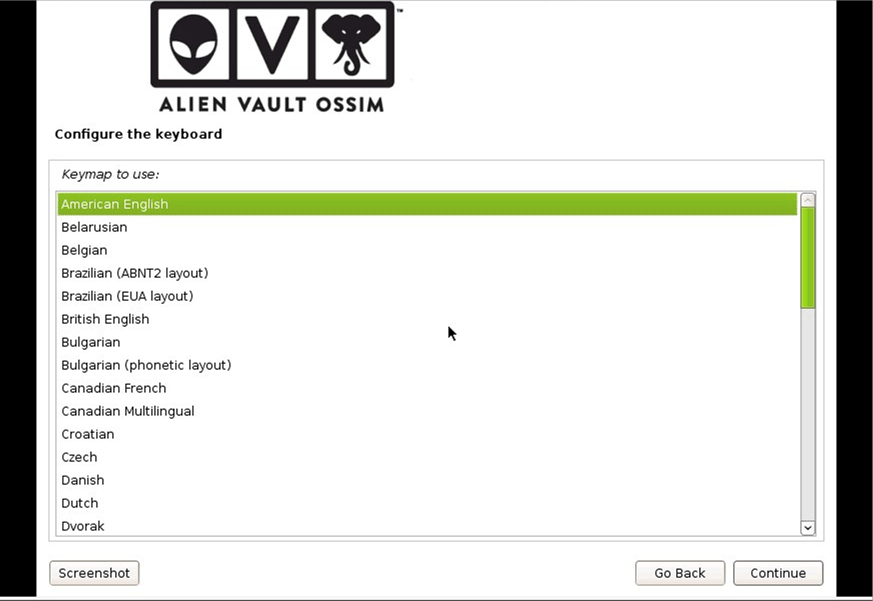
Configure the keyboard, Continue
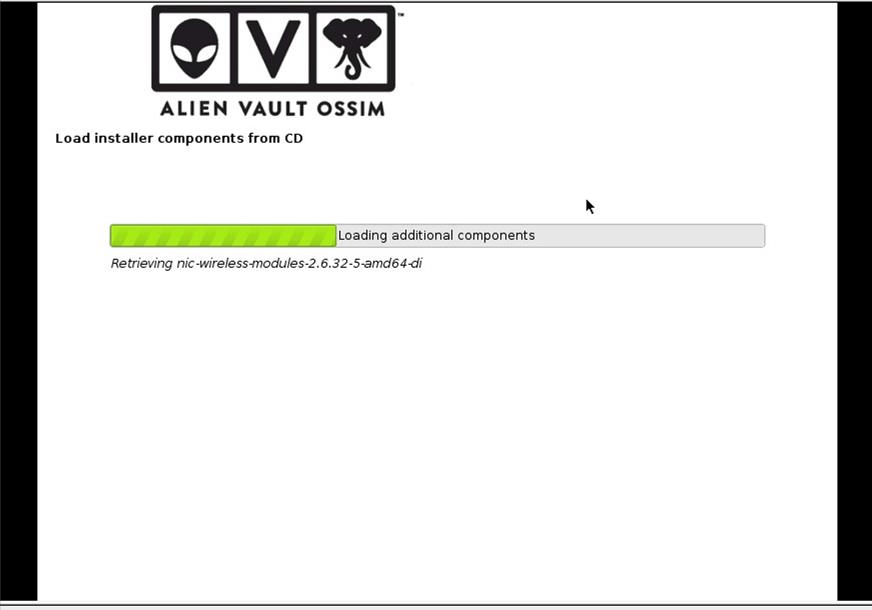
Wait for the components loading.
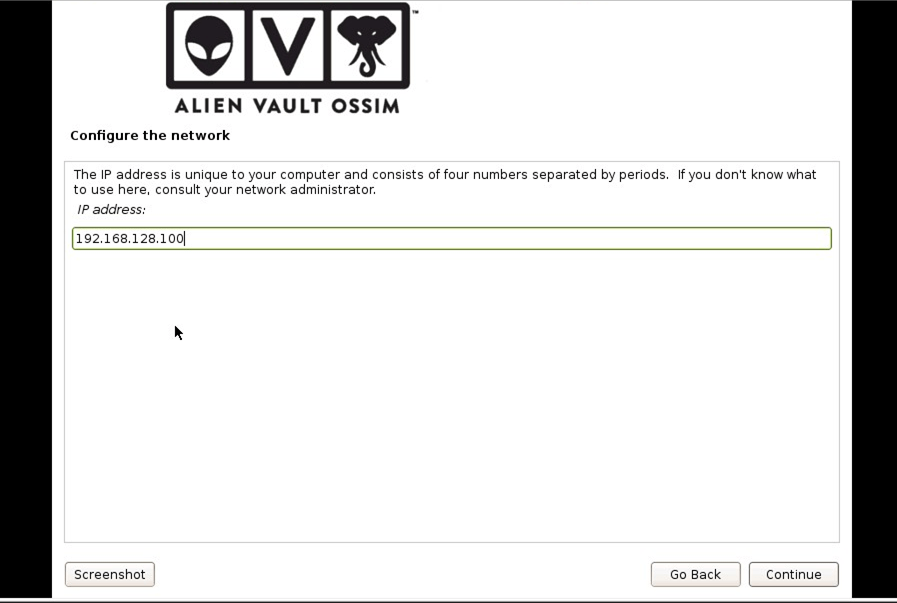
Configure the network, your OSSIM ip address, Continue
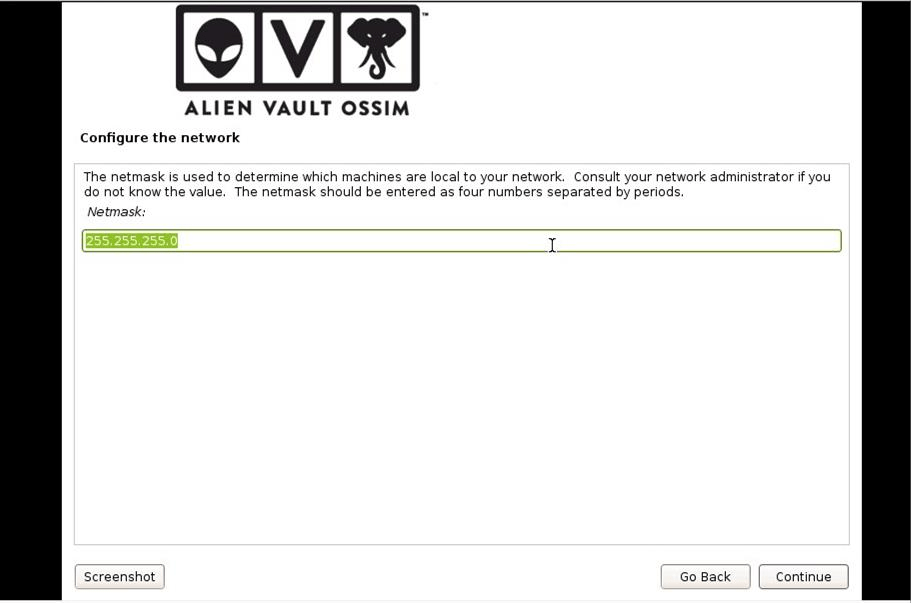
Configure your OSSIM Netmask

Set your network gateway, by default this will automate filled, Continue
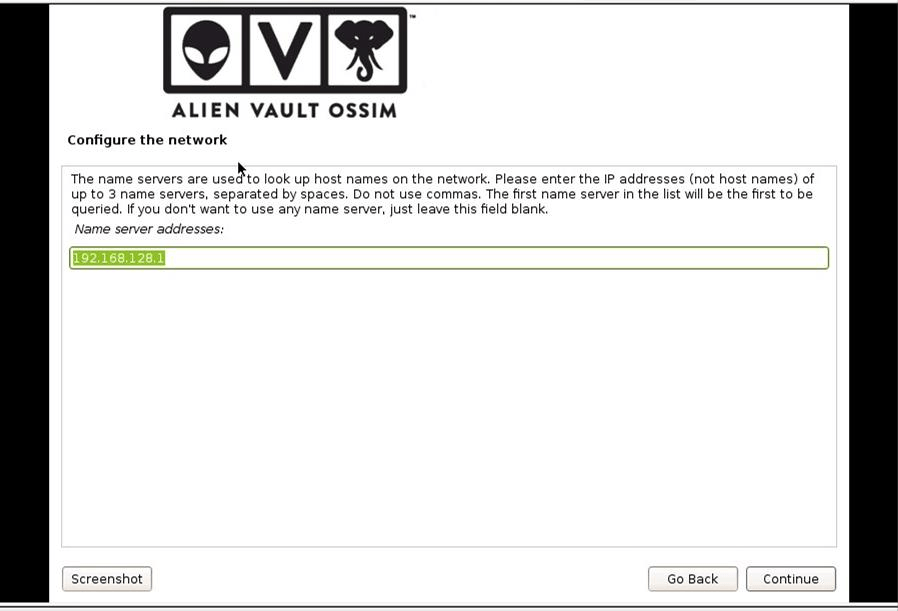
This for name server configuration, you can fill with ip or host names, you can used maximum for 3 name servers, click Continue
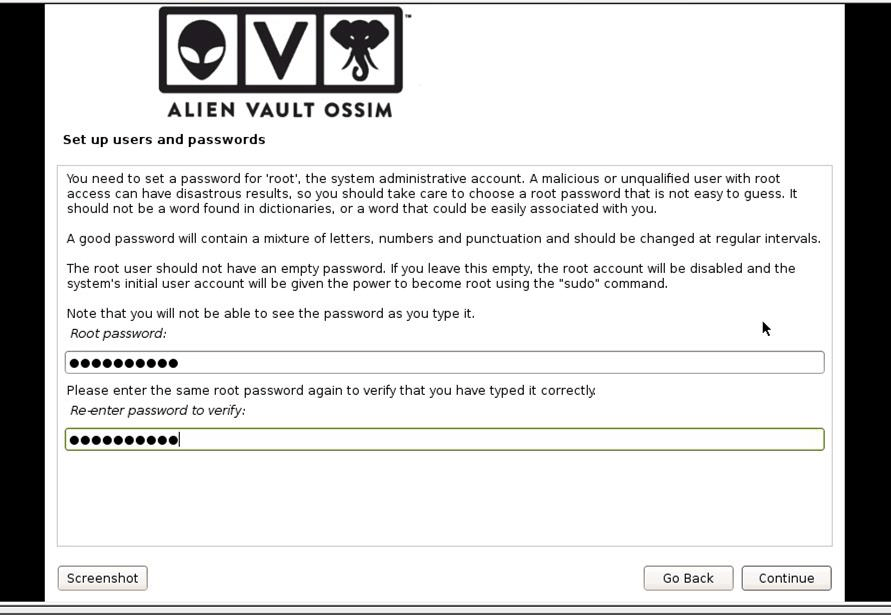
Set your OSSIM root passwords
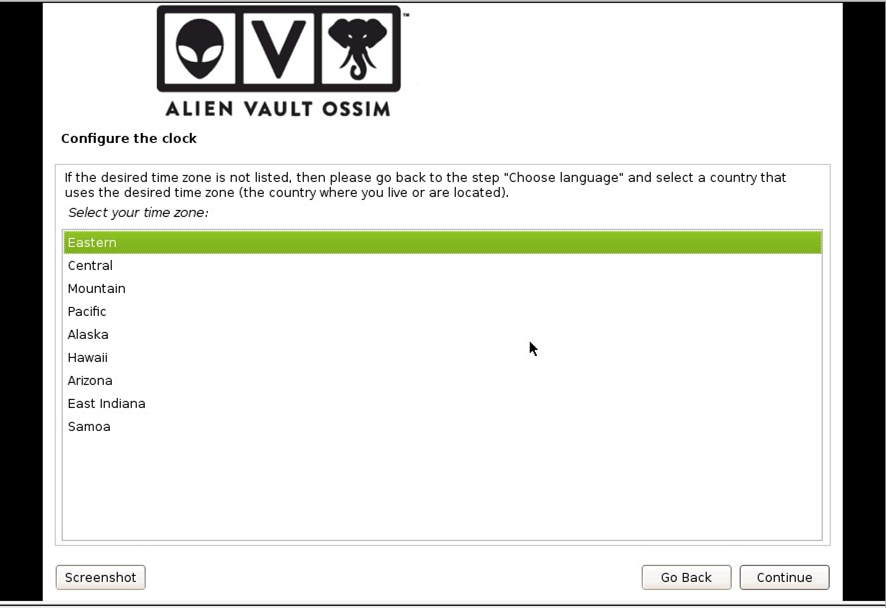
Configure the clock, based on your Time Zone
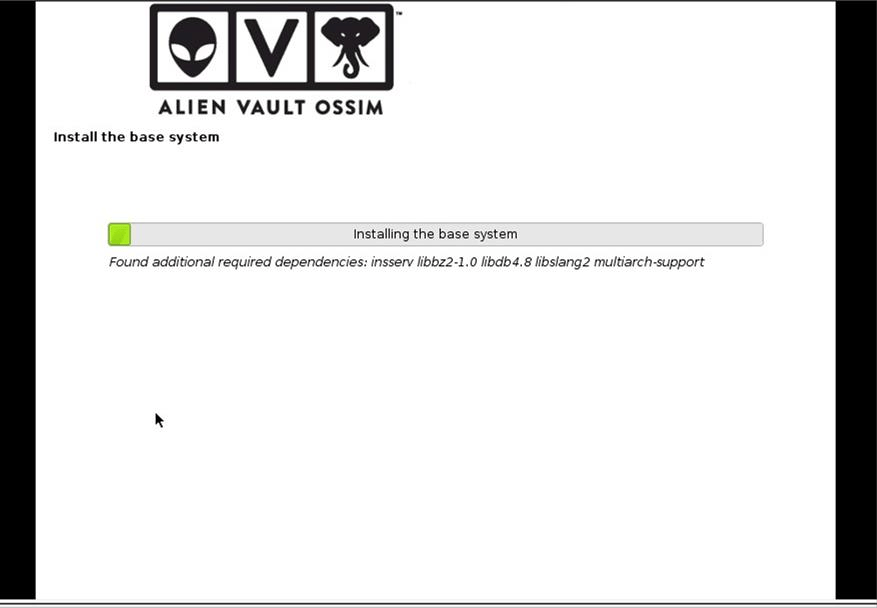
And then the installation process start, wait for a few moments, it’s not going to be so long time for the installation process.
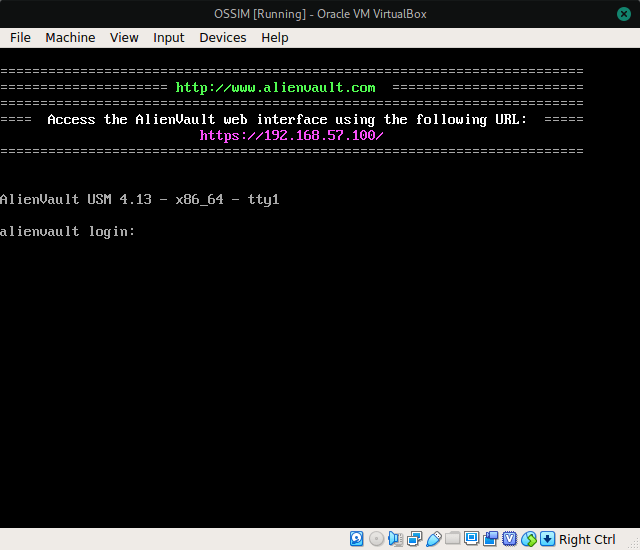
And this is your root console after the installation process finished. You can login with root username and the password from the password that you create during the installation.
OSSIM Console
From OSSIM console, you can set configuration and enter the OSSIM jailbreak terminal mode. Login with the root password.
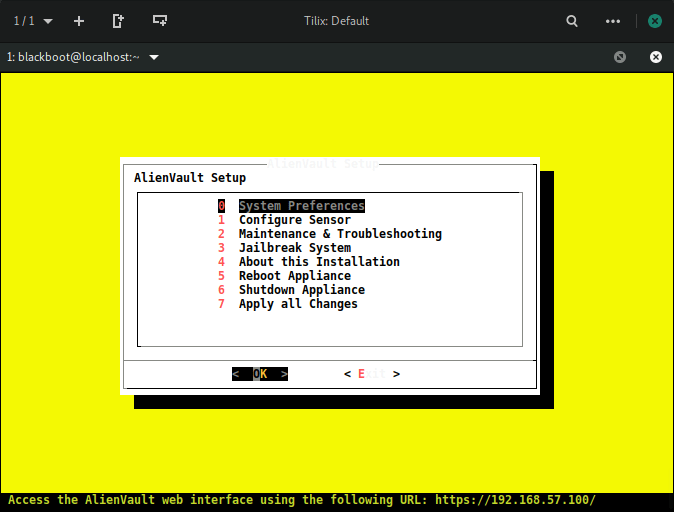
This is AlienVault Setup Menu
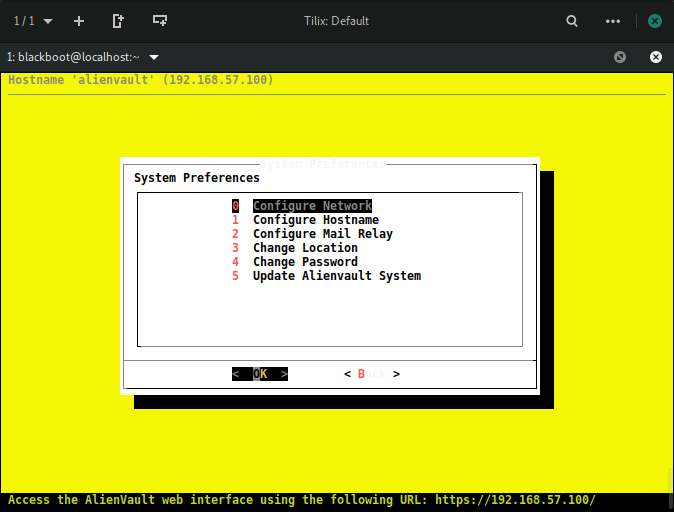
Systems Preferences Menu
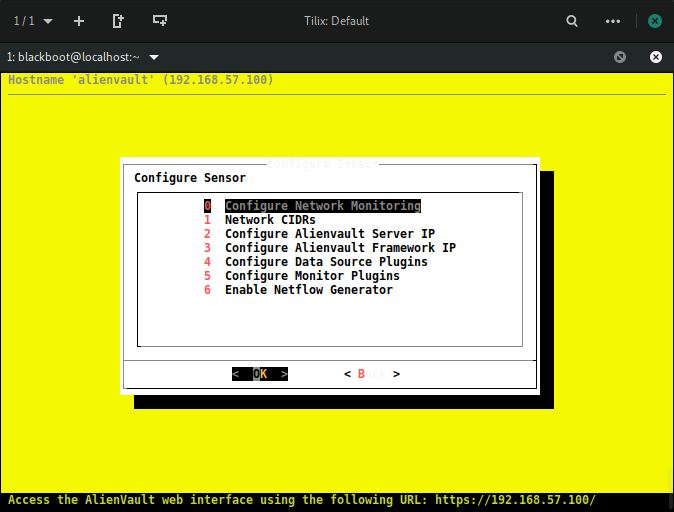
Configure Sensor Menu
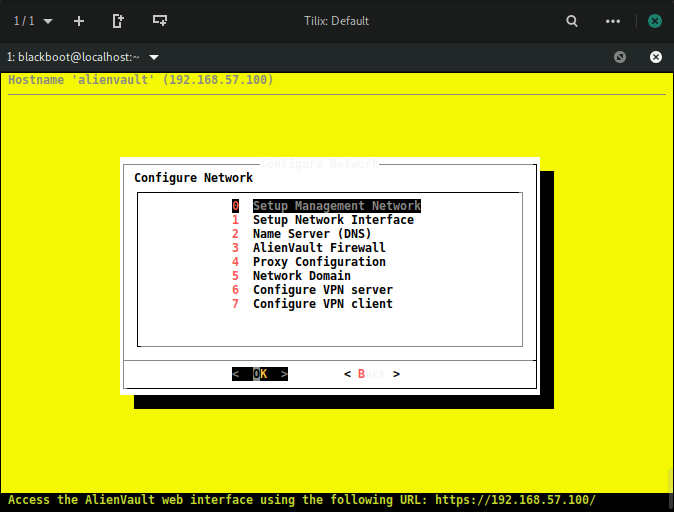
You can change your network configuration with Configuration Network Monitoring menu
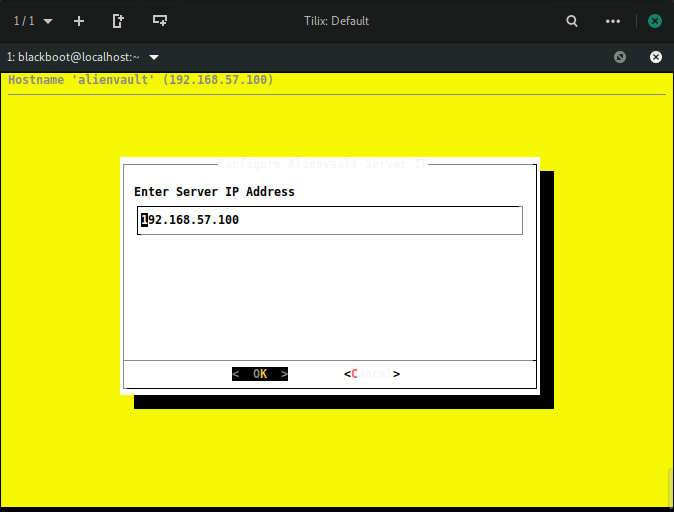
This for your OSSIM server ip address configuration.
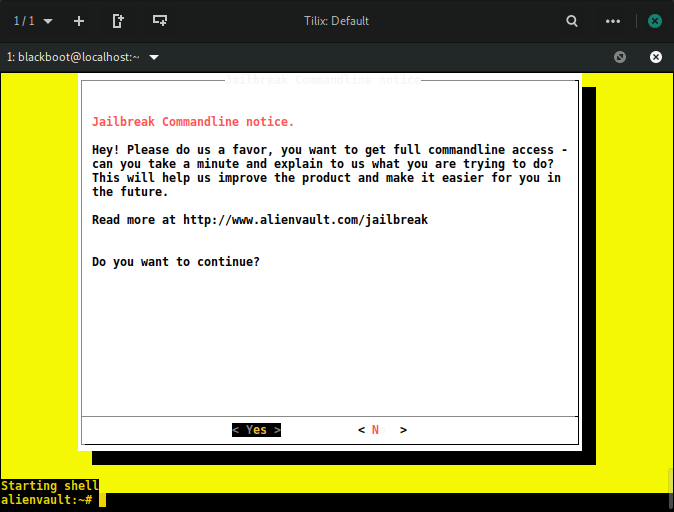
Jailbreak options for CLI configuration mode.
OSSIM Web User Interface
Access your OSSIM on your browser with OSSIM IP Address.
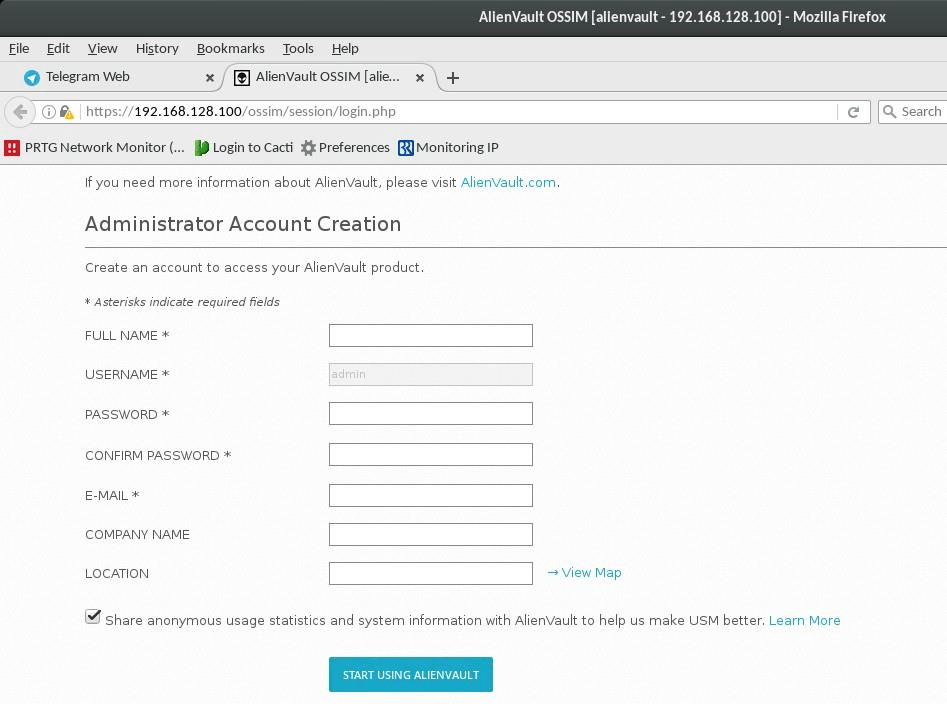
Set Administrator for admin login to the web user interface.
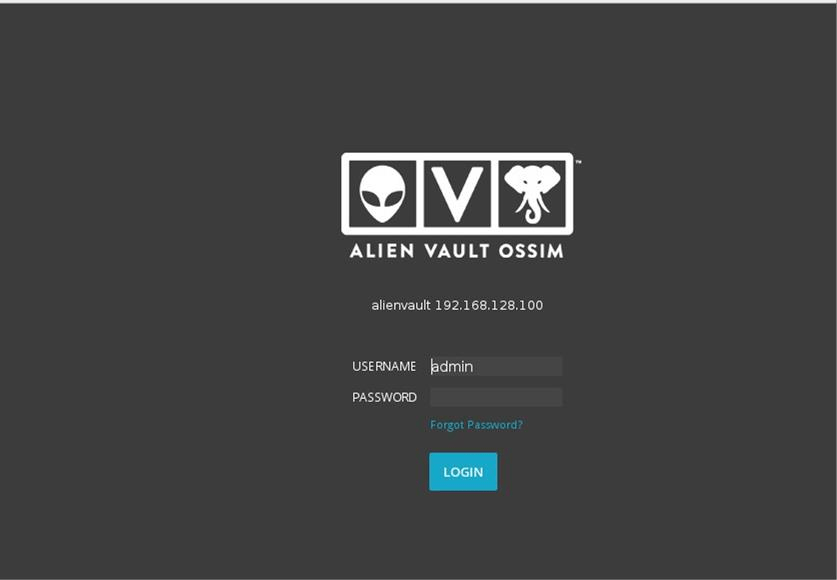
Login with admin password.
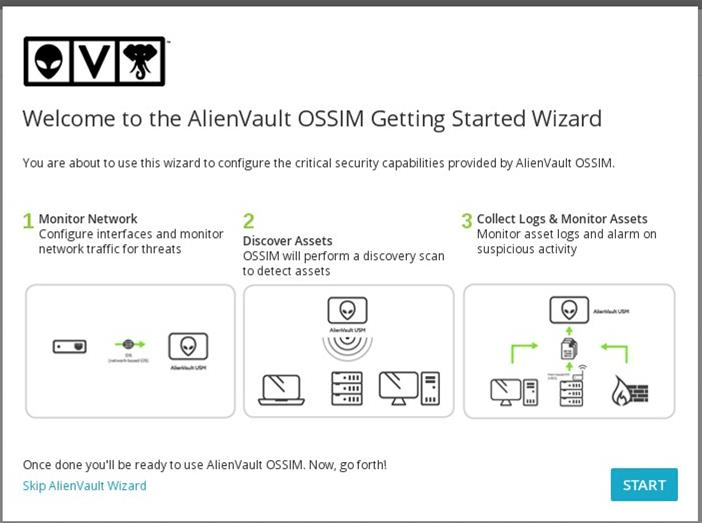
For the first login, you should start the Alienvault OSSIM wizard, to discover assets on your locally network automatically, or you can skip this wizard, and add the asset manual by your own.
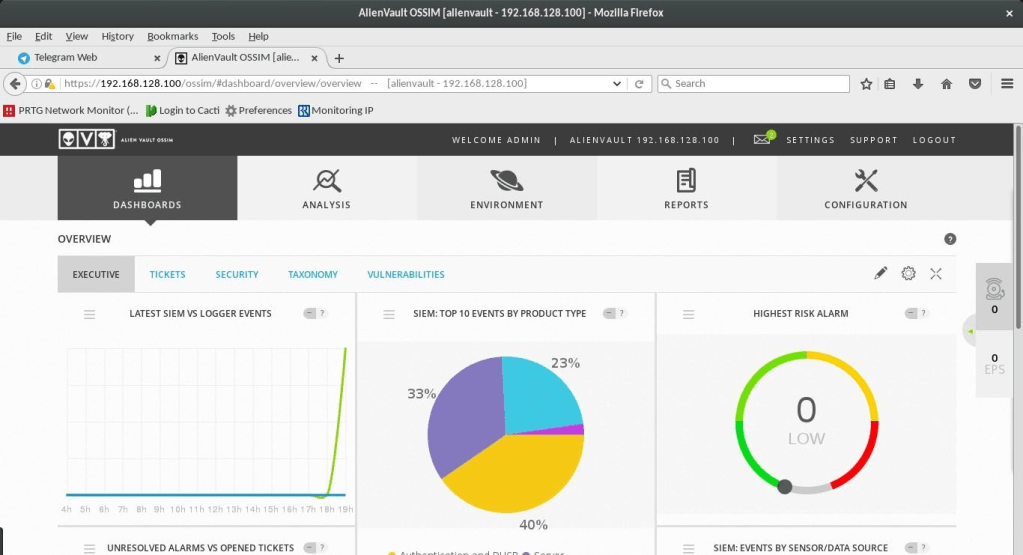
Alienvault dashboard will show up, for the first, this dashboard only capture log from OSSIM self, so this is why the next topic will discuss about how to forward syslog to the OSSIM and show the event to the dashboards.
So check for the next part of OSSIM Alienvault topic to continue your OSSIM SIEM journey………..
